Design Specifics
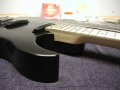
Bolt-on Neck
Typically, bolt-on necks use wood screws which I always felt was underkill for what they were doing; holding the two largest components of the guitar together from caving under the tension of the strings, for playing purposes and making a tight joint so vibrations will transfer more readily. In fact, on seeing the heel of a Fender Stratocaster, I assumed that the actual fasteners were covered by the plate at the heel that was held on by those dinky wood screws. I cant cite any instances where the old method has failed, probably because there arent any, but Im sure it is much less likely that this method will strip the wood of the neck or need to be repaired. It isnt significantly more difficult to attach the neck in this way while the stainless steel flathead machine screws continue the rugged mechanical style of this EOM.
The nuts and machine screws are both from Mcmaster-Carr. The nut is, more specifically, a stainless steel nut meant to be welded in place. I used these nuts due to the flat sides which stop them from spinning in their recesses and the large flat top surface which prevents them from sinking into the neck when the machine screws are tightened. The weld nuts also had to be small enough to fit in the top of the neck below the fretboard. These 10-24 threaded nuts are a bit pricey at about $1 each, but can be found in a non-stainless steel variety for about a tenth of that price. I opted for the stainless version since it would be difficult to replace them if they ever started to rust. The flathead 10-24 stainless steel machine screws use an allen key. This may be even more of an advantage over wood screws which usually have slotted or Phillips heads; allen screws can be tightened to any torque without having to worry about striping the head or marring the finish since the driver essentially never slips out of place while tightening them.
No neck mounting ferrules/ washers were used on this octave mandolin. Without a washer, the machine screws pulled into the wood a bit with their angled and much 0.4 inch diameter head. I was thinking about using the 5/8 inch diameter counter bore neck mounting ferrules sold by Stewart Macdonald used for custom contoured heels of bolt on neck guitars. Unfortunately, they are too large for the small neck pocket of this EOM as compared with the guitar neck pocket they are made for. A custom made version of the Stewmac washer made for a 1/2 inch diameter counter bore would fit well and make for a cleaner look at the heel, but would be expensive to have made one off since I dont have access to a machine shop right now. An insert of a harder wood such as maple could help that problem, but would not work as well as metal. Larger 1/4-20 machine screws with a 0.5 inch diameter head are also available along with a matching weld nut that has the same flange dimension as the 10-24 version. (I didnt use this combination since I wasnt sure I could counter sink the hole to that head diameter with the countersink I have.) Even without any these solutions, the neck is incredible solid when all four of the bolts in place.
Peghead
I was originally planning on a 10 to 15 degree angle for peghead. (Ibanez uses about a 15 degree angle on their angled pegheads as do most acoustic guitars.) This idea was eventually dropped when I realized I would have to use a scarf joint or a very thick piece of wood to be able to fit the angled peghead. (I had originally thought I could get away with the whole thing in a 6/4 piece of maple.)
The large piece of wood method, is used to make Gibson Les Pauls. This would be especially wasteful in this case though, since the peghead is longer than a Les Pauls and the blank would need to be that much thicker.
A scarf joint on the other hand would require a special jig for the table saw so I could cut the joint cleanly without having to do any additional hand work. I also worried about breakage at the peghead due to a fall, which is a common problem on guitars. A scarf joint at this very critical section makes the area even more susceptible to breakage. This is especially true for an EOM since the peghead would be exposed well beyond the plane of the back of the body leaving it vulnerable if the EOM ever fell backwards. It would also make it necessary to support the guitar by the peghead when laying it down on its back, which would mean definite disaster if someone were to sit on it (not that sitting on it would ever be a good idea.)
I decided against the angled peghead in favor of a Strat style flat peghead with a unique and more modern outline. The flat peghead is much more resistant to breakage and is easier to make, although it does require an extra bit of hardware; string trees to make sure the strings break over the nut at a steep enough angle. Plenty of guitars are made with the other two methods (and I will likely try other methods in the future), but the flat peghead method seemed like a solid bet for a first try.
Output Jack
I moved the output jack from the lower bout to the front of the guitar to avoid interference while in any playing position. Stratocasters and many Ibanez guitars use an angled or inset jack in the front of the guitar for use with a straight end cable. The Stratocaster jack plate is larger than would easily fit in this design and the Ibanez jack appears to be mounted directly to the wood in an angled counterbored hole, which could be difficult to do. My design uses the less slick and less common, but much easier to implement method of simply flush mounting the jack through the top of the guitar. With a 90 degree 1/4 inch cable end or adapter this should allow the cable to stay out of the way in most every possible way you would want to hold the EOM. Even with the more common straight cables, it is far enough away from the strings that it wont interfere while playing.
Wiring Design
The electronics consist of two potentiometers which are wired to control the master tone and volume. The three way on-on-on mini switch allows switching between the two pickups with the center position using the signal from both pickups. I choose the mini switch over a standard three way switch mostly since I like the look and feel of these switches and they fit the overall look of the guitar. After seeing EOM assembled, I think a larger switch may better fit the scale of the other components even though I like the look of these switches. Although I used this fairly basic wiring setup, the combinations for this basic setup really are endless, especially considering the 4 conductor wiring of the humbucker pickups which allow each pickup to be wired in many different ways.
Reference/ Further Reading
My main reference for this projects design and construction outside of numerous websites (most of which can be found in the directory section of this website) was the book Make Your Own Electric Guitar and Bass by Dennis Waring and David Raymond where the authors build a bolt on neck Stratocaster copy with two humbuckers. It includes helpful design and construction ideas, many of which shaped the way I built this EOM.