Making the Keys
Grinding
 To turn rake tines into thumb piano keys, I first cut off the bent section of the tines using a large set of pliers. Even with the largest pliers I could find (with an eight inch handle), it was still hard to cut the tines. I used a grinder to square up and smooth the cut edge, which was left very sharp from cutting. I ground down the sharp corners then gently rounded the edges for a much larger and more comfortable playing edge. The remaining sharp edges and burrs were removed by running the end over the grinder at a variety of angles until it was completely smooth.
Bending
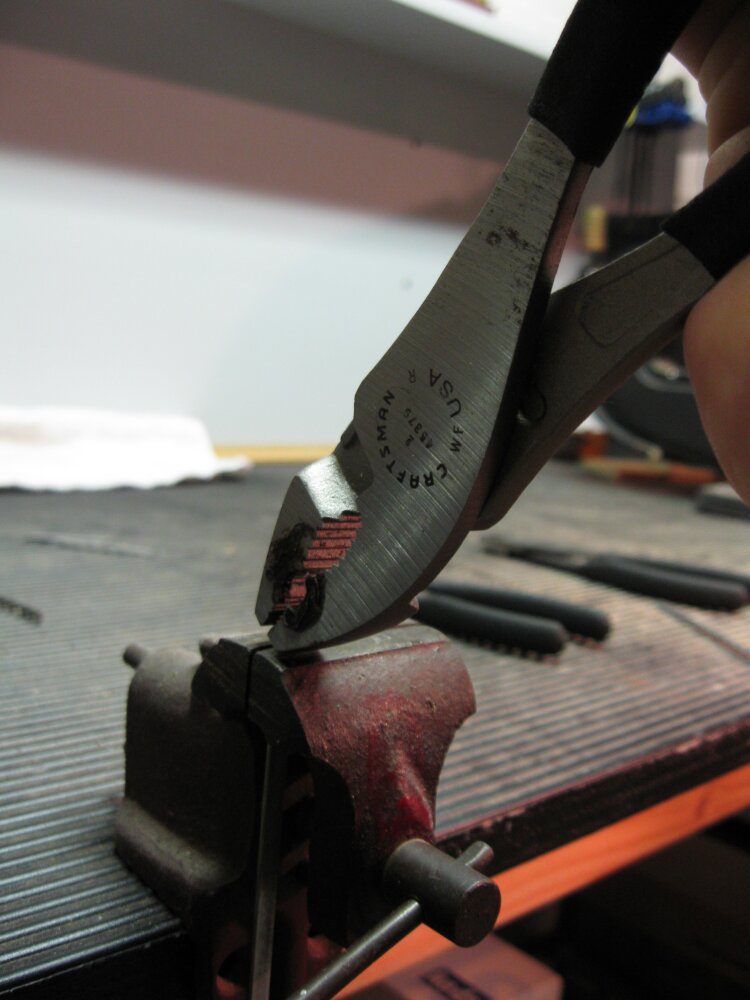 I used a small vise and the same pliers from before to bend over the edges of the tines. This bend makes sure the ends point down and away from the player when installed on the thumb piano making the keys more comfortable to hit with the thumb. To get the bend consistent over 15 keys, I clamped each key to the same depth in the vise. Then, I firmly grabbed the exposed section and bent the key until my pliers were at about 45 degrees. This left me with the bend I was looking for and was very repeatable.
Cutting to Length
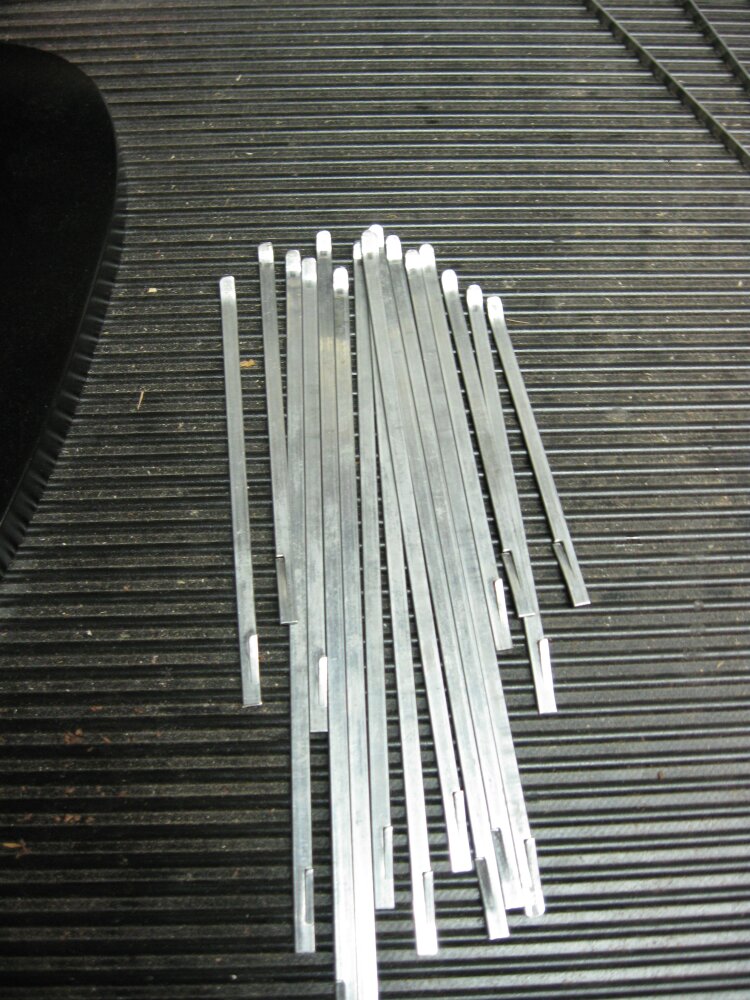 I used a previous version of this thumb piano I had already made to get the approximate length for each key. If you havent made a thumb piano already, do not cut the keys to length yet. Instead, its best to put the thumb piano together and tune it with the keys still at their full length. Then, mark each key where it should be cut off so you can be sure youll have enough length to tune each one to the note you want. I cut my keys so the non-played end was just short of overhanging the edge of the sound box. This was enough length to allow for a bit of flexibility when trying different tunings, but mostly prevents the overhanging section from catching on other objects. I wont try to write out the lengths I used for my keys since they will differ depending on the exact rake tines you use and the tuning you choose. Once cut to size, its a good idea to grind the non-played end smooth since it will be pushed to lower the note played when tuning the thumb piano. If either of the keys ends arent smooth and deburred, they can make tuning really painful.
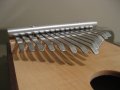
Polishing
 I used a dowel chucked in the drill press with piece of 600 grit wet dry sandpaper double-side taped to it to sand the keys. I dunked each key in water then sanded the uneven, dirty, slightly corroded, pitted and scratched surface until it was smooth. I used steel wool, also wrapped around the dowel, to buff each key to a nice shine. The steel wool wasnt taped on: It wrapped around the dowel and matted together on its own. This step, especially polishing with the steel wool, could probably be done just as easily by hand if you prefer.
Tuning
 I tune my 15 key thumb pianos to two full octaves of a g major scale. The very center key is tuned to the low g. From there, the scale alternates back and forth between the sides. Overall, the thumb piano is tuned like this from left to right:
F D B G E C A G B D F A C E G
The best method Ive found to tune the thumb piano to the correct pitches is to use a piano to play a reference tone, then to match the thumb pianos note to that reference tone. Ive also tuned the thumb pianos low g or middle g with a tuner, and then filled in the rest of the scale by ear until it sounded like a major scale through both octaves. Even easier than these methods would be to use a chromatic tuner (my tuner only works with the notes g, d, a and e since its made for tuning violin family instruments), but I havent had a chance to try tuning a thumb piano with one of these.
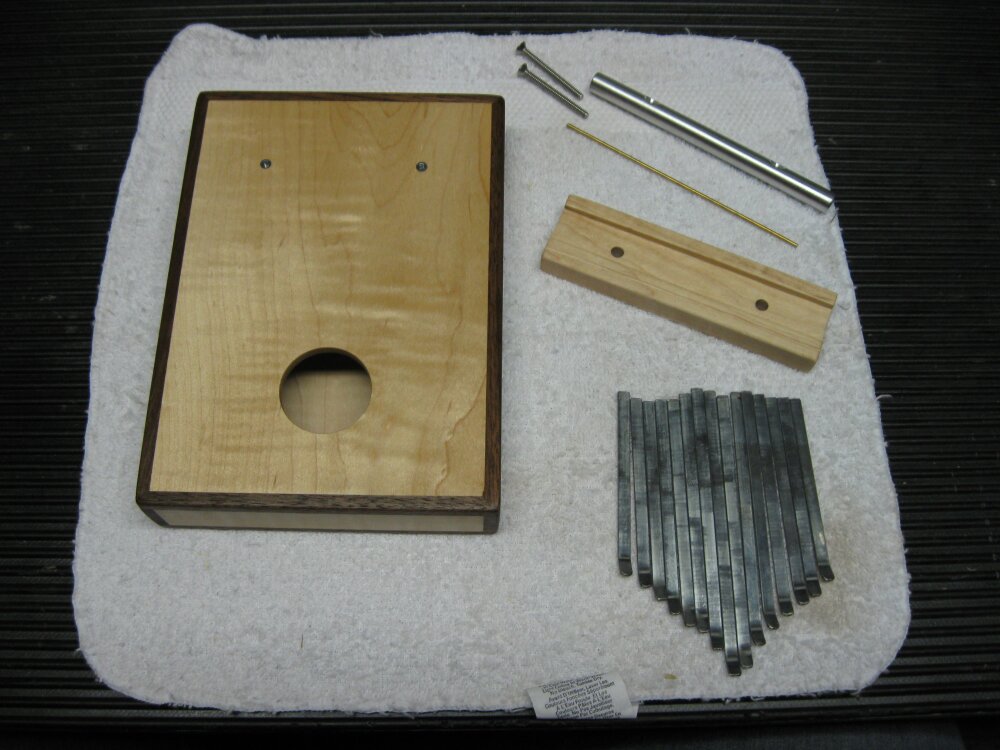
Overall, tuning a thumb piano can be a real pain since you not only have to tune 15 keys, you have to tune them all at once. This is very different from a guitar (with a mere six strings) where you can tune one string without even putting on any of the others. To make tuning a thumb piano manageable, I start by putting all of the keys in place with the rod and screws just loose. Then, I bring the rod to partial tension on the keys. I use a finger or a hard object like a flathead screwdriver to push each keys ends, moving the key back and forth and raising or lowering its pitch. Once Im satisfied with the tuning, I tighten the screws as much as I can without harming them.