Building the Form
The form was the first thing I built. It consists of a plywood mould and the head and tail blocks which will support and strengthen the sides and top. This form is different from those usually used with a traditional mandolin. Because of the angled design of the sides on this mandolin, the head block and the form have to be carved or cut for clearance to accommodate the twisting sides. An alternative to shaping the form would be to cut out clearance on the mould where the sides curve. This would make for less carving and would save some headaches. I used 3/4 inch pine plywood for the form. I would suggest using some of the nicer birch or hardwood plywood, especially if you plan on making more than one mandolin from the same form. It would be much easier to work with a higher quality hardwood plywood that does not chip out as easily as the pine ply does.
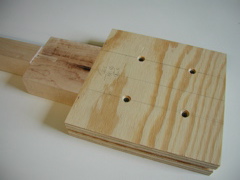
Head Block and Neck Blanks

 These are
the blanks for
the head block and neck. The joint was cut out on a table saw using a
tenoning jig. The joint is very tight and was easy to make
accurately.
The Form Blank
 This previosly mentioned
head block in position next to the form blank. The form blank was
made with two 3/4 inch thick pieces of plywood and a 1/4 inch spacer to
make up the 1.75 inch high form (the same thickness as the sides.) Four
decking screws secure the plates together.
Assembled
 I attached the head
block to the form with a piece of plywood screwed into both
components. The holes in the head block will be covered by the
top so they won't affect the finished look of the mandolin. The pattern
was printed out from the plans and then glued with
a glue stick onto
the form. These paper templates make for a very fast and easy way to
layout the design.
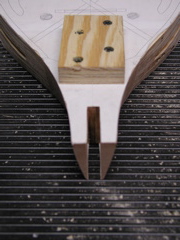
Adding the Tailblock

 The tail block is held
in only by a very (very) tight fit. The holes drilled at the corners
are there to stop interferece where it is impossible to carve
effectively. It is easiest to drill these holes first, then cut out the rest of the opening and fit the opening to the tailblock.
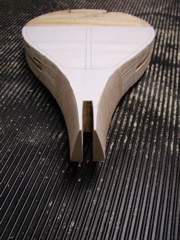
Shaping the Sides

 Using the patterns on
the top and bottom I carved out the final shape on the head block and
the angled reliefs on the form. I used a microplane rasp to do the
carving. The end result is not perfectly flat, but it is close enough
to glue up. Any gaps between the sides and blocks will be covered
by the top and back.
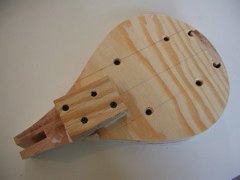
The Completed Form
 Here is the completed
form ready for the sides.
