The Top
More Templates

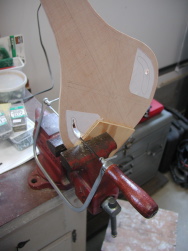
 After the top was
thickness planed, I cut out the basic shape about an 1/8th of an inch
oversized using the rim as a
guide. I used a paper template to line up and center the sound
holes and draw out where the bracing would go.
After the top was
thickness planed, I cut out the basic shape about an 1/8th of an inch
oversized using the rim as a
guide. I used a paper template to line up and center the sound
holes and draw out where the bracing would go.
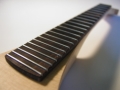
Cutting the Soundholes
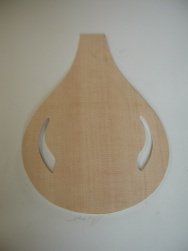 I drilled a hole and then
rough cut the sound holes with a coping saw. I did the final shaping
and smothing of the holes with files.
I drilled a hole and then
rough cut the sound holes with a coping saw. I did the final shaping
and smothing of the holes with files.
Notching the Bracing

 I cut the bracing from the
larger spruce bar meant for guitar bracing and then fit the two braces
together. I fit the bars length to fit within the outline of the kerfed lining.
Usually the bracing would run all the way to the sides, but that didn't
seem to practical with this design due to its size.
I cut the bracing from the
larger spruce bar meant for guitar bracing and then fit the two braces
together. I fit the bars length to fit within the outline of the kerfed lining.
Usually the bracing would run all the way to the sides, but that didn't
seem to practical with this design due to its size.
Glueing on the Braces
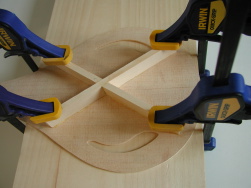 I glued the bracing to
the top while uncarved and very oversized. I did the glue
up on a thick board (happens to be the planing sled form earlier) to
ensure a flat top.
I glued the bracing to
the top while uncarved and very oversized. I did the glue
up on a thick board (happens to be the planing sled form earlier) to
ensure a flat top.
Carving the Braces
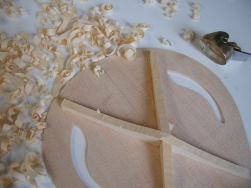 This little fingerplane
was very helpful for carving the braces. I could easily take them down
quickly or remove small amounts of material for precise shaping.
This little fingerplane
was very helpful for carving the braces. I could easily take them down
quickly or remove small amounts of material for precise shaping.
Completed Top
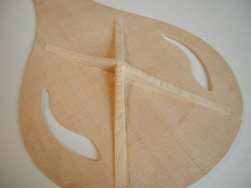 Here is the finished
top. To complete the bracing, I rounded over the edges. The finished height
is somewhere around 3/8ths of an inch in the middle, and less than a
1/16th of an inch at the tips.
Here is the finished
top. To complete the bracing, I rounded over the edges. The finished height
is somewhere around 3/8ths of an inch in the middle, and less than a
1/16th of an inch at the tips.