Fret Work
Leveling the Frets
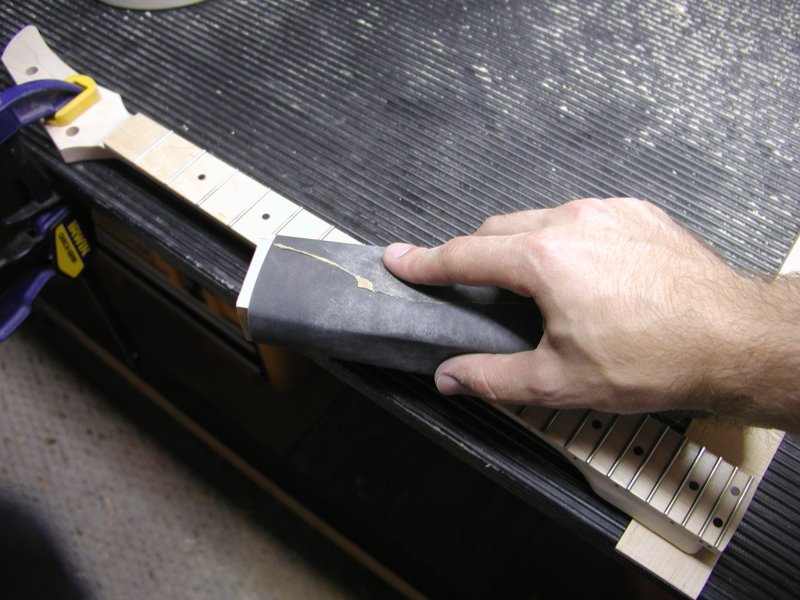 I started with 600 grit sand paper attached to a wood block to level the frets. I removed material from the frets until they all had at least a 1/32 wide flat spot on their top surface.
Fret Ends
Although the diagonal pliers got very close to the edge when cutting off the excess fretwire, they still left a slightly rough edge. To get rid of it I smoothed the frets individually with a few light, careful passes with a needle file.
Fret Bevel
Stewmac sells a special file which is held at an angle in a piece of plastic to allow for a consistent bevel on all of the fret ends. (It wouldn't be to hard to make a version of this tool out of wood and I'll probably do so for my next project.) I was able to do this job by hand using a standard mill file with the handle removed. Even without the specialized tool I was still able to get a very consistent angle without too much fear of destroying the maple fretboard below the frets.
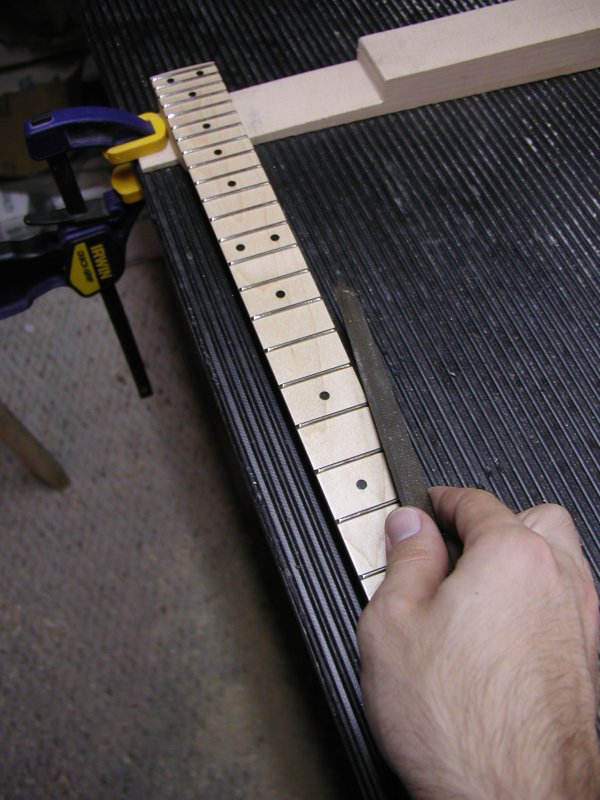 I held the file firmly to the edge of the frets using both hands. The file was also angled in relation to the fretboard (as shown in the picture) in order to get a better grip. I let my fingers ride of the top of the frets and on the side of the neck so the file would stay aligned with the fretboard. I kept the file riding on multiple frets so it would remain parallel to the neck and wouldnt contact the fretboard. It seems like a lot to think about, but by the time I got to the second side of the fretboard I was making quick work of the job.
The actual bevel cut was made so the fret ends were angled at about 45 degrees to the fretboard surface. I made sure that the cut was deep enough so that the fret ends were cut below the sides of the fretboard. This takes care of any sharp edges at the very corners of the fretwire where they meet the surface of the fretboard.
Fret Dressing
 I used a new and improved fret dressing method for this mandolin which included my new fret crowning file. I dressed each fret individually, starting by taping the fret off with a few layers of painters tape on either side to protect the fretboard. I crowned the each fret with my crowning file until the flat top of the fret just barely went away. I used 400 grit paper to smooth the rough finish left by the relatively course fret crowning file. 0000 steel wool was used to polish the fret to a nice shine. It is important not to overdo any of the steps that individually remove material from the top of the frets: You could cause the frets to no longer be level with each other which could cause the strings to buzz on random frets. The last step was to round over the edges of the fret ends for a smooth, hand-friendly finish. I used a standard needle file and a bit of caution and was able to round over the entire edge of each fret without marring the fretboard.